Using Playscii for CPC Art
Playscii is a very versatile tool to create not only different kinds of ASCII art but also animations. We'll focus only on the part of creating standard Amstrad ASCII here.
New file
After starting the editor press:
- File -> New
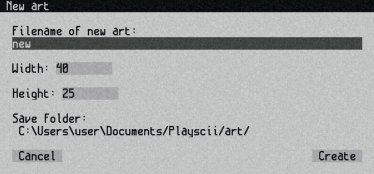
- Select a name.
- Leave the Width and Height. (For mode 0 set the width to 20, for mode 2 set it to 80.)
- Remember the save folder!
- Click on "Create".
Select charset and colours
- Press the space key, so that the charset/colour picker pops up.

- Click on "Set: ..." (e.g. "Set: c64_petscii")
- Select the correct CPC character set. Mostly, you will want to choose CPC Mode 1.
- Click on "Palette: ..." (e.g. "Palette: c64_original")
- Select "cpc" as "Palette: ...".
- (In case you see a gray colour after the white colour, then you should either ignore this colour or install an updated colour palette.)
Paint
Now you should be able to paint.
Attention: For Mode 1 use only 4 colours, for Mode 0 not more than 16 and for Mode 2 only 2. If you use more colours, then the excess colours will be ignored.
Export
- Click on 'File' -> 'Export...'
- (Do not use 'Export last'. This option does not work always.)
- Select the CPC exporter. (If you can't see this option, you need to install it.)

- Chose a file name and click "export".

- Enter a number for the background colour. For zero, leave it 0.
- If you want to start the emulator Caprice after saving the file, activate the corresponding checkbox.
- Caprice.exe must be within the PATH environment variable. You may test it from command line.
- After clicking on "export", an executable bin file will be created.
Run the program
The easy way
The emulator Caprice Forever (21.6 or later) allows running bin files directly.
JavaCPC has similar features, if set up correctly.
The harder way
Otherwise, put the resulted bin file on a disk (.dsk) and run it in any emulator. To put it on disk, you can use a tool like ManageDsk.